前言
本人打算提高个人的C++基础编程水平和图形学理解,所以再再再次启动了tinyrenderer的程序编写,相较于之前被动的抄写代码,我准备选择直接观察他的代码结果后根据自己的理解进行编写,并进行结果比较。
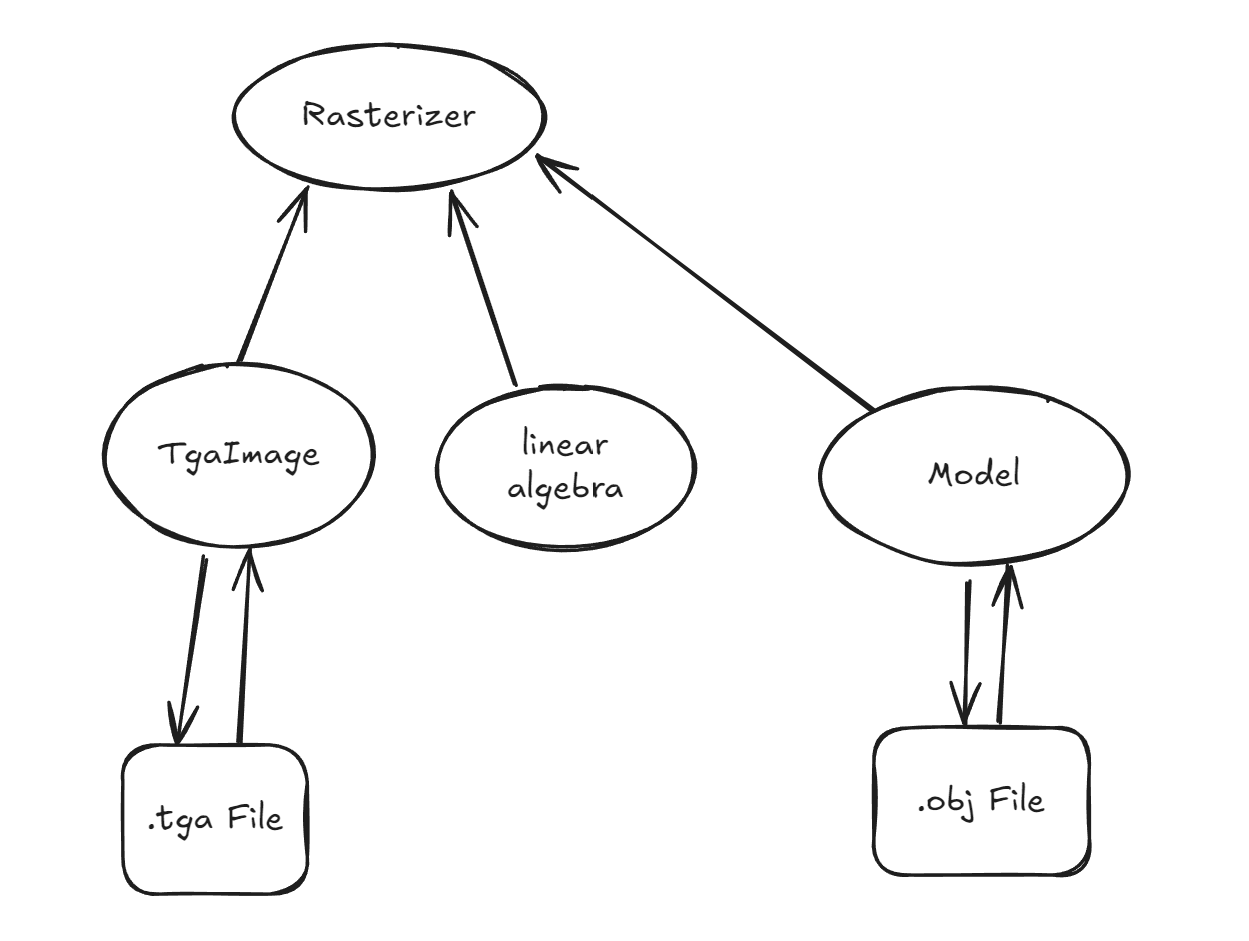
开始编写前,思考出如图所示的基础架构(如果这可以称为架构的话) 项目结构如下
 1
 2
 3
 4
 5
 6
 7
 8
 9
10
11
12
13
14
15
| .
├── CMakeLists.txt
├── geometry.cpp
├── geometry.h
├── main.cpp
├── model.cpp
├── model.h
├── obj
│ └── african_head.obj
├── rasterizer.cpp
├── rasterizer.h
├── README.md
├── sandbox.cpp
├── tgaimage.cpp
└── tgaimage.h
|
源码可以在这里看到
tgaimage.h和tgaimage.cpp复制自ssloy的初始提交,可以在lesson01的wiki看到,在此不多赘述。
基础设施建设
向量类
在GAMES101的作业中,使用了线性代数库 Eigen,但是对于本环境的代码来说,并不需要这么强大的功能,所以参考原仓库手搓了一份向量类
 1
 2
 3
 4
 5
 6
 7
 8
 9
10
11
12
13
14
15
16
17
18
19
20
21
22
23
24
| template <typename T>
struct Vec2{
union{
struct{T x, y;};
struct{T u, v;};
};
Vec2(): x(0), y(0) {}
Vec2(T _x, T _y): x(_x), y(_y) {}
};
template <typename T>
struct Matrix4{
std::array<T,16> data;
Matrix4():data({0}){}
T get_index(int i, int j) const{
return data[i * 4 + j];
}
Matrix4(std::initializer_list<T> list) requires requires{list.size() == 16;}{
int i = 0;
for(auto it = list.begin(); it != list.end(); it++){
data[i++] = *it;
}
}
};
|
仅做举例,关于重载运算符等操作不多赘述。
其中,使用 union 内的 匿名 struct 达到了.x 与.u 访问同一内存的效果。
Matrix4(std::initializer_list<T> list) requires requires{list.size() == 16; 的写法来自软研C++组的支持, requires requires{list.size() == 16} 表明在构造函数时必须调用一个16个元素的列表。
Matrix 结构体尚未经过测试,可能存在bug。
Model类
头文件定义
 1
 2
 3
 4
 5
 6
 7
 8
 9
10
11
12
13
14
15
16
| class Model{
public:
Model() = delete;
explicit Model(const std::string& filename);
[[nodiscard]] std::vector<Vec3f> getVerts() const {return verts_;}
[[nodiscard]] std::vector<Vec2f> getUV() const {return uv_;}
[[nodiscard]] std::vector<Vec3f> getNorms() const {return norms_;}
[[nodiscard]] std::vector<std::array<std::array<unsigned short,3>
, 3>> getFaces() const {return faces_;}
private:
std::vector<Vec3f> verts_;
std::vector<Vec2f> uv_;
std::vector<Vec3f> norms_;
std::vector<std::array<std::array<unsigned short,3>, 3>> faces_;
};
|
wavefront obj 文件是由wavefront 公司所创建的模型格式,受到各类建模软件的广泛支持。该模型会在行首声明数据类型
- v代表vertice,顶点
- vt 代表vertice texcoord,纹理坐标
- vn代表nromal,法线
- f代表face,即面
face应该是最特殊的行数,下面是一个示例
1
2
3
| f 321/304/321 318/302/318 147/127/147
f 456/446/456 321/304/321 525/517/525
f 456/446/456 525/517/525 457/447/457
|
数据每一行分成了三部分,每一部分都代表了一个顶点数据,分别代表顶点索引,贴图索引和法线索引,即
1
| vert/texture/normal vert/texture/normal vert/texture/normal
|
所以使用了 std::vector<std::array<std::array<unsigned short, 3>, 3>> 这种臃肿的数据结构。
构造函数
 1
 2
 3
 4
 5
 6
 7
 8
 9
10
11
12
13
14
15
16
17
18
19
20
21
22
23
24
25
26
27
28
29
30
31
32
33
34
35
36
37
38
39
40
41
42
| Model::Model(const std::string &filename) {
std::ifstream file(filename);
if ( !file.is_open()) {
std::cerr << "Error opening file " << filename << std::endl;
return;
}
std::string line;
while (std::getline(file, line)){
std::istringstream iss(line);
std::string type;
iss >> type;
if(type == "v") {
Vec3f v;
iss >> v.x >> v.y >> v.z;
verts_.push_back(v);
}else if(type == "vt"){
Vec2f vt;
iss >> vt.x >> vt.y;
uv_.push_back(vt);
}
else if (type == "vn"){
Vec3f vn;
iss >> vn.x >> vn.y >> vn.z;
norms_.push_back(vn);
}
else if (type == "f"){
std::array<std::array<unsigned short, 3>, 3> face{};
char slash;
for (int i = 0; i < 3; i++) {
iss >> face[i][0] >> slash >> face[i][1] >> slash >> face[i][2];
}
faces_.push_back(face);
}
}
file.close();
std::cout << "Loaded" << verts_.size() << " vertices" << std::endl;
std::cout << "Loaded" << uv_.size() << " uv" << std::endl;
std::cout << "Loaded" << norms_.size() << " normals" << std::endl;
std::cout << "Loaded" << faces_.size() << " faces" << std::endl;
}
|
构造函数会打开文件后按行读取,根据行首的类型压入对应的动态数组,并在读取完后输出消息读取数量。(不知道为什么,switch语句不支持string类型,所以使用连续的 ifelse 进行逻辑判断。)
布雷森汉姆直线算法
布雷森汉姆的核心思想是通过整形的计算代替浮点数的计算,获得更好的性能。
对于斜率大于1或斜率为负数这类情况,布雷森汉姆算法会交换起始点,由x步进改为y步进等方法保证适用于各种情况。算法实现来自GAMES101的作业实现。
 1
 2
 3
 4
 5
 6
 7
 8
 9
10
11
12
13
14
15
16
17
18
19
20
21
22
23
24
25
26
27
28
29
30
31
32
33
34
35
36
37
38
39
40
41
42
43
44
45
46
47
48
49
50
51
52
53
54
55
56
57
58
59
60
61
62
63
64
65
66
| void line(const Vec2i p1, const Vec2i p2, TGAImage &image,
const TGAColor& color) {
int x1 = p1.x;
int y1 = p1.y;
int x2 = p2.x;
int y2 = p2.y;
int x, y, xe, ye ;
int dx = x2 - x1;
int dy = y2 - y1;
int dx1 = std::abs(dx);
int dy1 = std::abs(dy);
int px = 2 * dy1 - dx1;
int py = 2 * dx1 - dy1;
if (dy1 <= dx1) {
if (dx >= 0) {
x = x1;
y = y1;
xe =x2;
}else {
x =x2;
y = y2;
xe = x1;
}
image.set(x, y, color);
for (int i = 0; x < xe; i++) {
x = x + 1;
if (px < 0) {
px = px + 2 * dy1;
}else {
if ((dx < 0 && dy < 0) || (dx > 0 && dy > 0)) {
y = y + 1;
}else {
y = y - 1;
}
px = px + 2 * (dy1 - dx1);
}
image.set(x, y, color);
}
}else {
if (dy >= 0) {
x = x1;
y = y1;
ye = y2;
}else {
x = x2;
y = y2;
ye = y1;
}
image.set(x, y, color);
for (int i = 0; y < ye; i++) {
y = y + 1;
if (py <= 0) {
py = py + 2 * dx1;
}else {
if ((dx < 0 && dy < 0) || (dx > 0 && dy > 0)) {
x = x + 1;
}else {
x = x - 1;
}
py = py + 2 * (dx1 - dy1);
}
image.set(x, y, color);
}
}
}
|
绘图
此时我们已经准备好了所有基本设备,准备好测试文件 sandbox.cpp
 1
 2
 3
 4
 5
 6
 7
 8
 9
10
11
12
13
14
15
16
17
18
19
20
21
22
23
24
25
26
| #include "rasterizer.h"
#include "tgaimage.h"
#include "common.h"
#include "model.h"
int main() {
TGAImage image(800, 800, TGAImage::RGB);
const Model model("../../obj/african_head.obj");
const auto modelFace = model.getFaces();
const auto modelVerts = model.getVerts();
for (int i=0; i<model.getFaces().size(); ++i) {
auto face = modelFace[i];
for (int j=0; j<3; ++j) {
Vec3f v0 = modelVerts[face[j][0]-1];
Vec3f v1 = modelVerts[face[(j+1)%3][0]-1];
line({(int)((v0.x+1.)*image.get_width()/2.), (int)((v0.y+1.)*image.get_height()/2.)},
{(int)((v1.x+1.)*image.get_width()/2.), (int)((v1.y+1.)*image.get_height()/2.)},
image, white);
}
}
image.flip_vertically();
image.write_tga_file("lesson1.tga");
return 0;
}
|
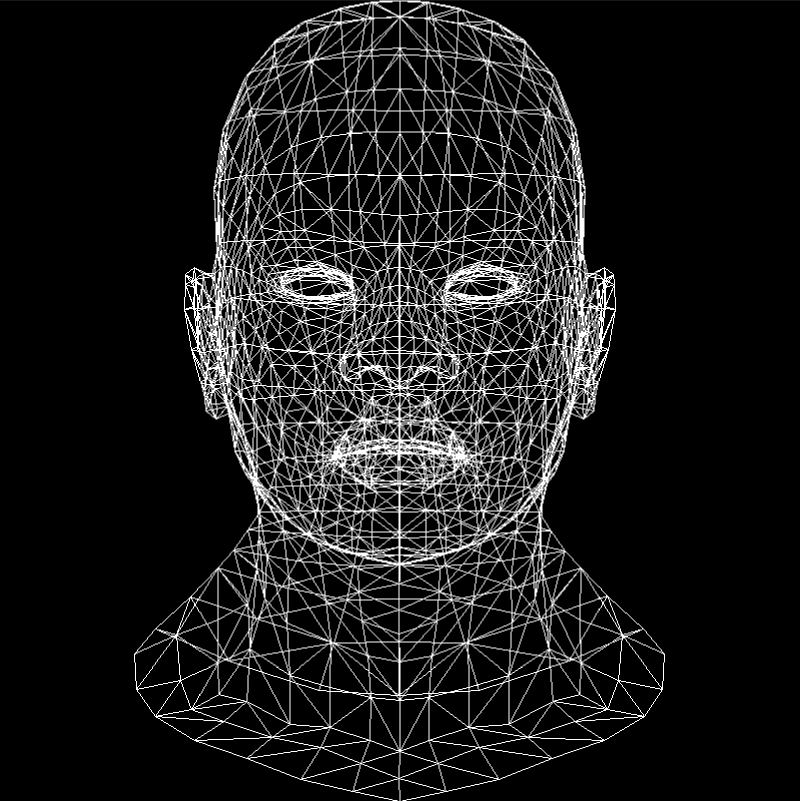
画出封面图
 项目结构如下
